🚀 Let’s kick-off
We’ve collected our top five favourite IcePanel features that you may not have noticed right away when exploring the tool. They are features that we believe will improve your workflow and efficiency in the tool to help you become a power user.
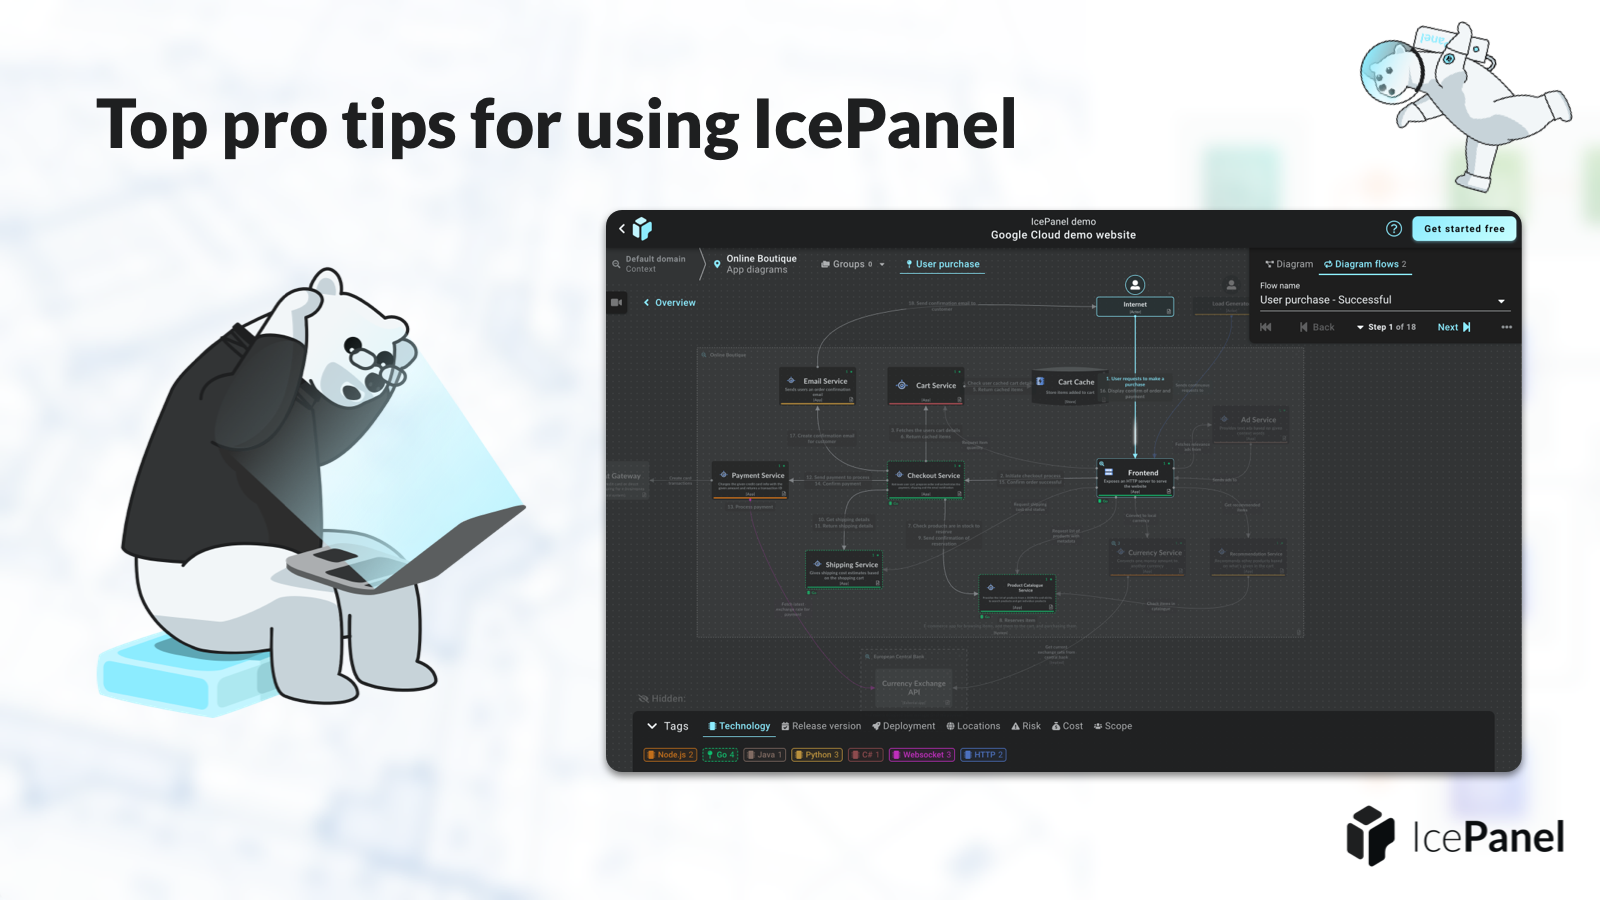
1️⃣ Dynamically show and hide diagram objects
Tags in IcePanel can dynamically show or hide objects in your diagrams to tailor them to different conversations or audiences without modifying the diagram itself. Let’s see how.
- Select an object or connection and assign a tag in the right panel.
- Turn on the appropriate group in the tag bar at the bottom.
- Hover on a tag and click the eye icon that appears to the right.
👻 Hiding future architecture
This is great for hiding services or connections that don’t yet exist. Tag things with a future tag and hide it to show the current state of your architecture.

2️⃣ Draw implied connections
Implied connections allow you to reuse existing connections created at lower levels of the C4 model. Let’s see how.
- Zoom into the 2nd or 3rd level and create a new connection between apps or components.
- Zoom upwards and draw a connection between the parent objects of the connection you created.
- Select an existing connection under the implied heading on the right panel.
Remember that the top context level is also for non-technical audiences, so don’t reuse connections with technical labels at that level.

3️⃣ Draw objects from another context
Diagramming component-to-component connections in the C4 model is challenging as the official guidance says you should avoid mixing scopes at lower levels. IcePanel allows you to break this restriction in a way that clearly communicates the hierarchy.
- Click the model objects menu in the toolbar.
- Select the other contexts tab at the bottom of the menu.
- Drag an object onto the diagram to draw it.
Bounding areas are automatically added to show the parts of the hierarchy that belong in other scopes. You can now create connections between scopes. This also works at the app level!

4️⃣ Populate your diagram through connections
Drawing existing objects and connections individually for a new diagram is slow and repetitive. IcePanel speeds this up by allowing you to toggle connections via the object connections tab.
- Drag and drop an existing object onto your diagram and select it.
- Select the connections tab in the right-hand panel.
- Toggle each connection you would like to show on the diagram.
IcePanel will automatically add the appropriate connection, object and bounding areas to the diagram.

5️⃣ Rapid creation of flow sequences
Creating diagram flows in IcePanel is already easy, but there’s a simple shortcut for adding steps even faster. New steps are inferred when selecting a connection on the diagram.
- Select the diagram flows tab in the right-hand panel and select a flow.
- Select a connection on the diagram and click add step.
- Fill in the text description for the step, and you’re done!
Now you can rapidly create your entire flow in just a few clicks.

🏁 To wrap up
Hopefully this article has shown you some things to help speed up your workflow when modelling software architecture inside IcePanel.
Let us know if any of these tips helped you out or if you have any more to add!
Stay chill 🧊
